Development Setup Guide
This guide will set up your development environment, ready for writing code for the rest of the course.
We will download/install:
- The Java JDK
- An IDE - Visual Studio Code (or VSCode)
- The Java 101 code
Install a Java JDK
We’re going to use AdoptOpenJDK, an open-source distribution of Java.
You can download the installer from here.
The link points to Java 14, but feel free to use a more recent version.
AdoptOpenJDK installer guide: https://adoptopenjdk.net/installation.html
Windows
- Download the latest JDK Installer for Windows x64. The downloaded file should be a .msi file.
- Follow the official installation guide found here with these modifications at step 3:
- Allow the installer to update JAVA_HOME
Your JDK installation will be at C:\Program Files\AdoptOpenJDK\<here>\.
Mac
- Download the latest JDK Installer for MaxOS x64. The downloaded file should be a .pkg file.
- Follow the official installation guide found here
Your JDK installation will be at /Library/Java/JavaVirtualMachines/AdoptOpenJDK-<version>.<jdk|jre>/
Install VSCode
To effectively write Java programs, most developers use an IDE (Integrated Development Environment).
Our IDE of choice for this course is Visual Studio Code - a lightweight editor that can be greatly extended with plugins.
Download and install VSCode from https://code.visualstudio.com
You will be shown a Welcome page on startup, You should click “Interface Overview” in the “Learn” section to get an overview of the basic controls and their names.
Required Extensions
VSCode is not natively a Java IDE, so we need to install some extensions to make writing, building, and running Java code simple.
You can install the plugins by following the links and clicking the Install button. Or you can search by their names in the Extensions ![]() sidebar.
sidebar.
You must restart VSCode after installing and configuring the extensions.
In order, these plugins add the following functionality:
- The ability to build programs using the JDK
- The ability to run built Java programs
- Intelligent autocomplete when writing Java
(Optional) Configuring Language Support for Java
If the Java extension reports an error you may have to configure the Language Support extension to use your installed JDK.
To do this, in VSCode:
- Go to
File > Preferences > Settings - In the search bar on the settings page, search for “java.home”, then click
Edit in settings.json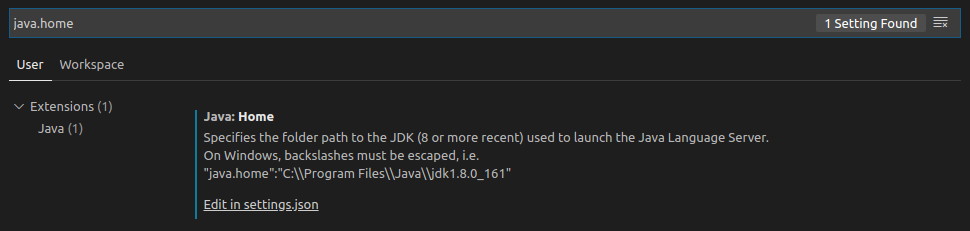
- Paste the path/location of your java installation inbetween the quotation marks for
java.home, and save. The entry should look like the below, substituting for your JDK install location:

Download the Course Code
To download the source code:
- Download the course code zip file from here
- Select where you want to keep your code to, e.g. a new folder
projectsin my Documents. - Unpack the zip file to your projects folder
To open the code in VSCode go to File > Open Folder, select the folder java-for-beginners-master and click OK.
Verify your Installation
To confirm you can run Java programs:
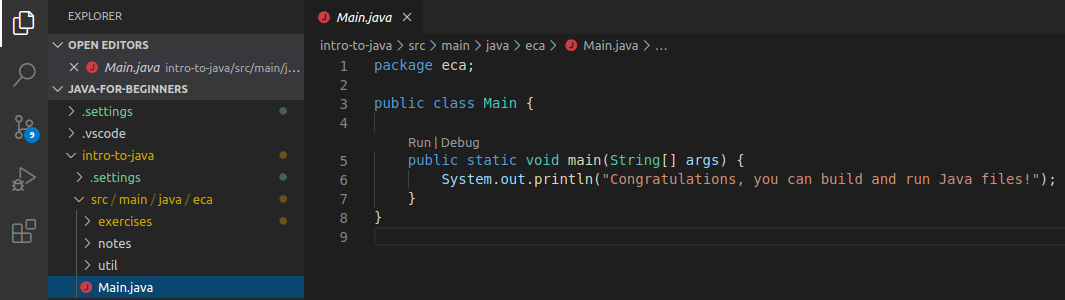
- Go to the Explorer menu by clicking the Explorer icon

- Navigate to
Main.javaby clicking on it in the explorer window.
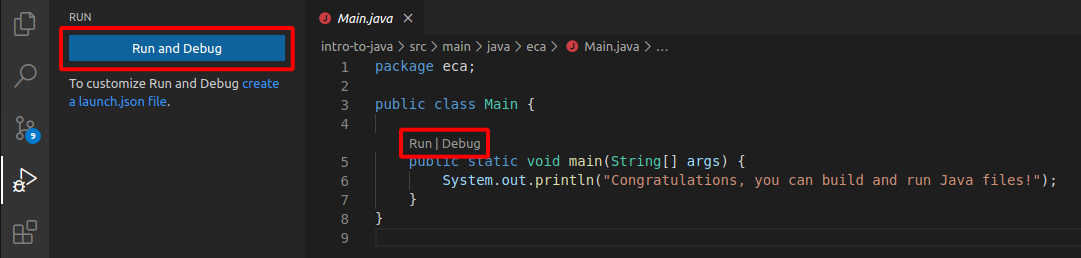
- Run
Main.javaby either:- Clicking on the Run icon
 , and clicking the
 Run and debugbutton. - Clicking the
runbutton above line five inMain.java
- Clicking on the Run icon
If the program runs (i.e. a box opens that says Congratulations, you can build and run Java files!) then you are ready to go.